Mold growth on bathroom ceilings is a common problem that can happen for a variety of reasons. Bathroom mold is not only an eyesore, but it can also be a health hazard if left unchecked. Understanding the root causes of bathroom ceiling mold and using the right removal techniques is key to getting rid of it for good. This comprehensive guide covers everything you need to know about identifying, treating and preventing mold on your bathroom ceiling.
Table of Contents
What Causes Mold on Bathroom Ceilings?
There are a few key factors that can create the ideal conditions for mold growth on bathroom ceilings:
Humidity and Moisture
Mold thrives in damp environments. The high humidity levels and moisture generated in bathrooms from hot showers provide optimal conditions for mold to grow. Steam and condensation can lead to water accumulation on surfaces like ceilings that then allows mold colonies to develop.
Poor Ventilation
Inadequate ventilation exacerbates humidity and moisture issues. Bathrooms need proper exhaust fans and ventilation to dispel humid air and prevent condensation buildup. Insufficient airflow lets moist air linger, creating a prime environment for mold.
Leaks and Water Damage
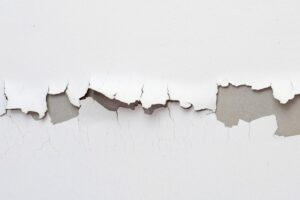
Leaks from plumbing or the roof can cause water intrusion and damage to bathroom ceilings. Mold will rapidly grow on drywall, plaster or tile if moisture seeps into these materials. Damaged areas like cracks or seams are also prone to trapping moisture.
Temperature and Lighting
Mold thrives in the range of 40°F to 100°F. Most household bathrooms fall right in the sweet spot. Low lighting conditions are also ideal for mold, which explains why it readily grows in dark, damp bathrooms with poor ventilation. Proper lighting can help inhibit mold growth.
Identifying Mold on Your Bathroom Ceiling
Detecting mold early is key to treating it before major growth occurs. Here’s how to spot mold on your bathroom ceiling:
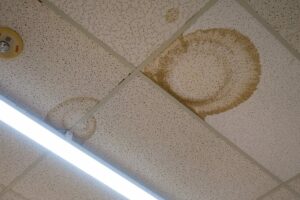
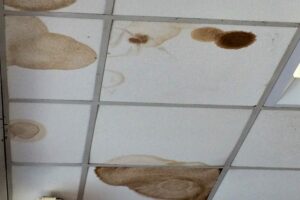
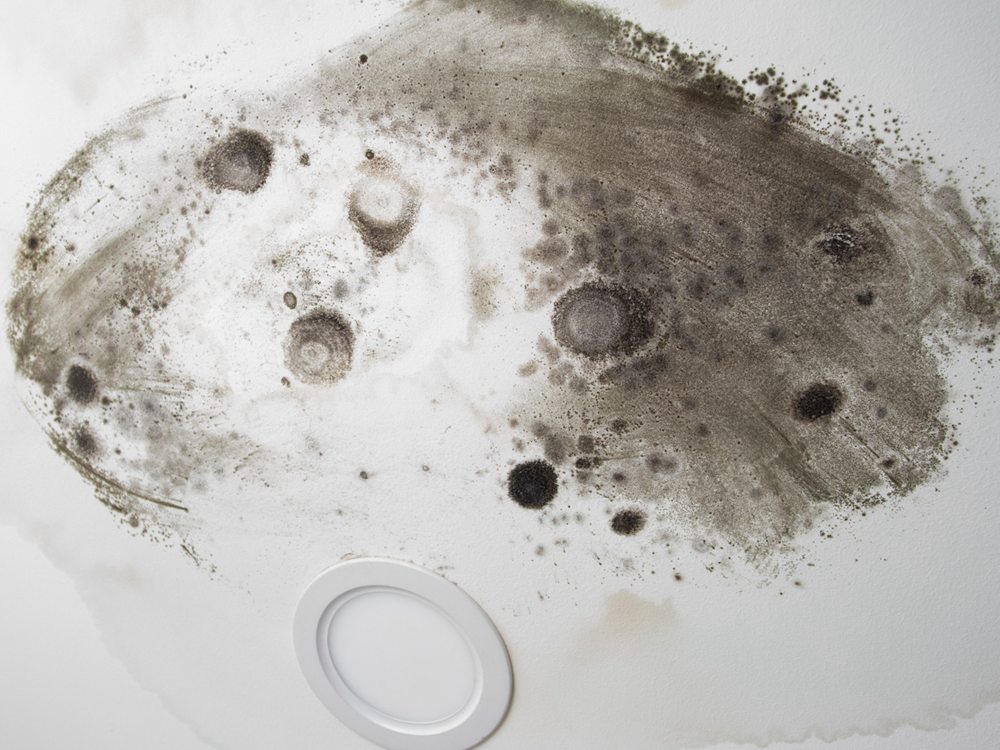
- Look for dark spots – Mold will appear as dark, stain-like spots. They may start small and spread in size. Green, black or brown colors indicate mold.
- Check for musty smells – An earthy or musty odor in your bathroom may indicate mold growth behind walls or above ceilings.
- See if spots grow – Mark edges of suspicious spots with a pen. Check back in a week. If they grow larger, it’s likely mold.
- Examine areas near vents – Mold flourishes around AC and heating vents due to temperature changes. Inspect thoroughly.
- Feel for moisture – Damp or wet spots signal moisture issues ideal for mold. Gently press on suspicious areas to check.
If you confirm mold growth on your ceiling, act quickly to treat it. Mold can lead to respiratory issues and continued moisture damage.
Hazards of Removing Mold from Bathroom Ceiling
Removing mold from a bathroom ceiling presents several potential hazards:
Exposure to Mold Spores
- Mold releases microscopic spores into the air which can be inhaled. This poses a health risk.
- Spores agitated during removal can spread to other areas. Containing work area is crucial.
- Respirators, gloves, protective clothing needed when handling moldy materials.
Fall Hazards
- Work overhead on ladders, scaffolding has fall risks. Ladders should be secured.
- Wear head protection in case of falling debris. Clear area under workspace.
Electrical Hazards
- Risk of contact with live wires in ceiling. Turn off power at breaker before starting.
- Inspect wiring before and after removal. Replace damaged wire.
Collapsing Materials
- Sagging, moldy drywall may collapse when disturbed. Secure work area.
- Shoring may be needed to support framing during drywall removal.
Sharp Objects
- Drywall panels have paper backing and cut metal corner beads. Creates sharp debris.
- Wear thick gloves and shoes when handling debris.
Eye Irritation
- Mold dust from sanding or debris can irritate eyes. Use eye protection.
Slips, Trips, and Falls
- Moldy drywall debris on floor is a slipping hazard. Keep work area clear.
- Use caution on ladders, scaffolds, and wet surfaces.
How to Remove Mold from Bathroom Ceilings
Once you spot mold on your bathroom ceiling, you’ll want to act quickly to contain and remove it. Here are key steps to take:
1. Fix any moisture issues first
Address underlying leaks or dampness issues to stop additional mold growth. Repair plumbing, seal tiles, improve ventilation or remedy other moisture sources.
2. Protect surrounding areas
Cover nearby surfaces like countertops with plastic sheeting. Place towels on the floor. This protects other areas from mold spores during the removal process. Turn off HVAC vents as well to stop spore circulation.
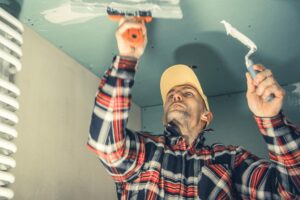
3. Suit up
Wear proper PPE when working with mold including gloves, goggles and an N95 respirator mask or respirator. Long sleeves, pants and shoe covers provide further protection.
4. Contain the mold
Isolate the affected area using plastic sheeting to stop spores spreading. Use painter’s tape to securely seal the plastic barrier.
5. Remove surface mold
Mix a non-toxic mold killing solution of 60% water, 40% white vinegar in a spray bottle. Lightly mist the moldy areas and let sit 15 minutes. Use a stiff nylon brush to gently scrub off mold. Rinse with clean water.
6. Kill and remove remaining mold
For any lingering mold, apply a commercial mold killing product like Concrobium or Mold Control. Follow product instructions.
Gently pry off any sections of tile, wallboard or plaster that remain heavily contaminated. Bag and dispose of moldy material.
7. Dry out the area
Use a dehumidifier, fans and open windows to fully dry out the bathroom. This removes any residual moisture and inhibits regrowth.
8. Disinfect and clean
Once dry, clean the area with hydrogen peroxide or bleach solutions. Vinegar also inhibits mold growth. Thoroughly sanitize the area.
Rinse cleaned areas with water to neutralize chemicals afterwards. Allow to fully dry.
9. Seal and repair
Seal previously moldy areas with a mold inhibiting primer like KILZ. Repair any damage using mold resistant drywall, caulk and sealants.
10. Monitor and maintain
Check the area periodically for any recurring mold. Maintain proper humidity levels and ventilation. Repeat cleaning if mold reappears.
Proper PPE and containment during removal protects you and prevents mold spore spread to other areas of the home. With diligent surface cleaning and moisture control, small bathroom ceiling mold situations can usually be successfully tackled as a DIY project.
However, extensive black mold growth requires professional mold remediation services. The Environmental Protection Agency provides guidelines on qualifications to look for in a professional mold removal company.
Hiring a Pro for Bathroom Ceiling Mold Removal
For large or challenging mold issues, hire a mold remediation specialist. Here’s what to expect:
Assessment
A professional will inspect and test the mold to identify the source and extent of growth. They’ll check for leaks and moisture issues.
Containment
The team will seal vents, doors and any openings. Plastic sheeting prevents mold spores from spreading during work.
Mold Removal
Professionals have industrial vacuums and commercial mold killers to thoroughly treat affected areas. They will remove and replace badly damaged sections.
Moisture Identification & Repair
Experts use moisture sensors and leak detection tools to pinpoint humidity issues or plumbing leaks contributing to mold. They can repair many problems.
Sanitizing & Deodorizing
After mold removal, they sanitize with disinfectants like bleach or antimicrobial coating. Odor removers treat any lingering musty smell.
Post-Remediation Check
Once the project finishes, the pro confirms mold levels are back to an acceptable range. Follow-up checks help ensure mold doesn’t return.
Hiring pros costs $500-$2000+ depending on your location and the size of the job. Get multiple quotes to compare pricing.
Preventing Bathroom Ceiling Mold
Prevention is the best way to avoid combating bathroom mold issues. Here are proactive measures you can take:
- Install and regularly run exhaust fans during and after showering or baths. Ventilate humidity outside.
- Open windows or run dehumidifiers to reduce dampness. Ideal indoor humidity is less than 50 percent.
- Use mold resistant paints and building materials like mold proof drywall. Avoid porous surfaces prone to moisture absorption.
- Caulk and seal tiles, corners, fixtures and other potential leak points.
- Regularly check under sinks, behind walls and tile joints for hidden moisture or leaks.
- Squeegee and wipe surface moisture after bathing. Towel dry walls and surfaces.
- Clean bathroom with mold killing solutions weekly. Use bleach or vinegar to sanitize regularly.
- Keep surfaces clean and dry. Fix leaks ASAP. Repair any drips or condensation issues.
- Improve ventilation and air circulation. Leave bath fans running 30+ minutes after showering.
Proper moisture control and prompt leak repairs deter mold growth on bathroom ceilings. But even with great prevention, humidity and dampness can still lead to mold periodically. Regular bathroom inspection and cleaning helps catch and destroy mold early before major growth occurs.
Frequently Asked Questions about Removing Bathroom Ceiling Mold
1. How do you know if black mold on the bathroom ceiling is toxic?
There is no reliable way to determine toxicity just by visual identification. Any dark black mold should be treated as potentially hazardous. The CDC recommends getting professional testing done to positively identify black mold types like stachybotrys chartarum before attempting removal.
2. Can you paint over mold on a bathroom ceiling?
Painting over mold is not recommended. Mold can continue growing under paint, and paint will eventually peel or get damaged. Proper mold killing treatments and removal should be done prior to painting bathroom ceilings.
3. What kills mold instantly?
No mold killer instantly destroys mold on contact. Commercial mold removal products need anywhere from 5 to 15 minutes contact time to effectively kill mold. Bleach solutions may work slightly faster but require precautions on certain surfaces.
4. Can you use bleach to remove mold from bathroom ceilings?
Yes, bleach can sanitize and kill mold on non-porous bathroom surfaces like ceramic tile or metal. Make sure to rinse and ventilate well after use. Bleach can damage or discolor vulnerable surfaces, so spot test first. Vinegar is a non-toxic alternative.
5. When should you call professionals for bathroom ceiling mold removal?
For large areas of visible mold growth, black mold, or mold in HVAC systems or behind walls, professional mold remediation is recommended. They have specialized containment and treatment knowledge. Homeowners can address smaller surface mold spots with proper precautions.
Conclusion
Mold growth on bathroom ceilings and surfaces requires swift action to eliminate health risks and prevent extensive damage. Controlling bathroom moisture and humidity levels proactively deters mold issues from developing. But even in damp rooms, diligent maintenance and cleaning can keep ceiling mold at bay. When mold does occur, understanding proper identification, containment, removal and prevention techniques is key to destroying bathroom mold safely and effectively. With vigilance and the right process, you can successfully tackle a bathroom ceiling mold problem.